Diy Kayaking Knife Sheath: A Step-By-Step Guide
Learn how to make a DIY kayaking knife sheath step-by-step in this concise guide. With just a few materials and easy instructions, you can create a practical and stylish sheath for your kayak knife.
Intro: Whether you’re an experienced kayaker or a beginner, having a knife handy can be essential for safety and convenience. However, simply carrying a knife in your kayak can be dangerous and impractical. That’s where a well-designed knife sheath comes in.
In this guide, we will show you how to create your own DIY kayaking knife sheath, ensuring that your knife is easily accessible when you need it, while also keeping it secure and protected. With a few basic materials and a little bit of time, you’ll have a custom-made sheath that fits your needs perfectly. So let’s get started and make your kayaking adventures safer and more enjoyable.
Gather Your Materials
To start making your DIY kayaking knife sheath, gather all the necessary materials before diving into the step-by-step guide. With everything prepared, you’ll be ready to create a functional and customized sheath for your kayaking adventures.
Kayaking is an exhilarating water activity that allows you to explore serene water bodies and appreciate the beauty of nature. If you’re a passionate kayaker, having the right tools and accessories is essential. One such tool is a reliable knife that can come in handy during emergencies or for various tasks while out on the water.
In this DIY kayaking knife sheath guide, we will walk you through the process of creating your own custom sheath to keep your knife safe and easily accessible. To get started, let’s gather all the necessary materials and tools.
List Of Necessary Materials And Tools:
- Kydex sheet: This thermoplastic material is durable and widely used for making knife sheaths. It is available in various thicknesses and colors.
- Rivets: Used to secure the Kydex sheet and form the sheath.
- Eyelets: To create attachment points for mounting the sheath on your kayak or life jacket.
- Webbing or paracord: Provides adjustable fastening options for the sheath.
- Fire starter: This can be a small ferro rod or a waterproof match case to ensure you always have a way to start a fire in emergency situations.
- Exacto knife or utility knife: Essential for cutting the Kydex sheet to size and shape.
- Hot air gun or heat source: Used to heat and mold the Kydex sheet into the desired shape of your knife sheath.
- Sandpaper or file: To smoothen and refine the edges of the Kydex sheath.
- Drill with bits: Required for creating holes for rivets and eyelets.
- Pliers or rivet setter: Necessary for securely fastening the rivets.
Now that you have a clear list of the materials and tools you’ll need, it’s time to move on to some important safety precautions to follow during the DIY process. Safety should always be a priority, so let’s dive into these precautions next.
Safety Precautions To Follow:
- Work in a well-ventilated area: When heating the Kydex sheet, fumes may be released. Ensure that you are in a properly ventilated space to avoid inhaling any harmful gases.
- Wear safety glasses and gloves: Protect your eyes and hands while handling sharp tools, hot Kydex, and drilling holes.
- Use a heat source cautiously: Whether you choose a hot air gun or another heat source to mold the Kydex, be mindful of the heat. Avoid burning yourself or causing damage to any surrounding objects.
- Keep a fire extinguisher nearby: Since you’ll be working with heat and flammable materials, it’s crucial to have a fire extinguisher handy in case of an accident.
- Take breaks when needed: Working on DIY projects can be time-consuming, so remember to take regular breaks to prevent fatigue and maintain focus.
With these safety precautions in mind, you’re ready to proceed with creating your very own DIY kayaking knife sheath. Stay tuned for the next steps in this comprehensive guide. Happy crafting and stay safe out on the water!
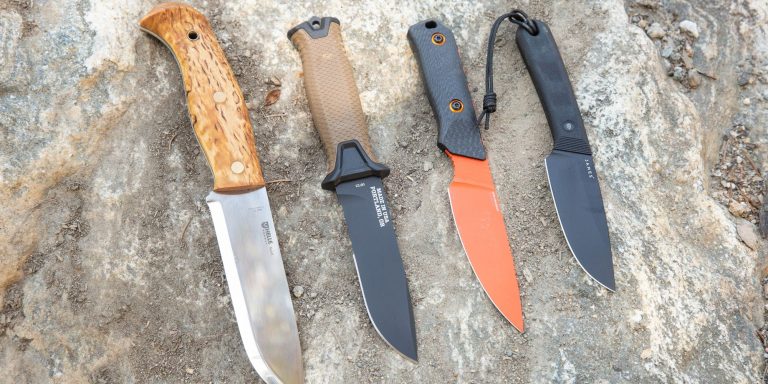
Choosing The Right Knife
In this definitive guide, learn the step-by-step process of crafting a DIY kayaking knife sheath. Expert tips and clear instructions make choosing the right knife and creating a practical sheath easier than ever.
When it comes to kayaking, having a reliable and functional knife is essential. Whether you need it for safety purposes or to quickly cut fishing line, a well-chosen knife can be a valuable tool. But with so many options available, how do you know which one to choose?
Here are some considerations for selecting a suitable kayaking knife:
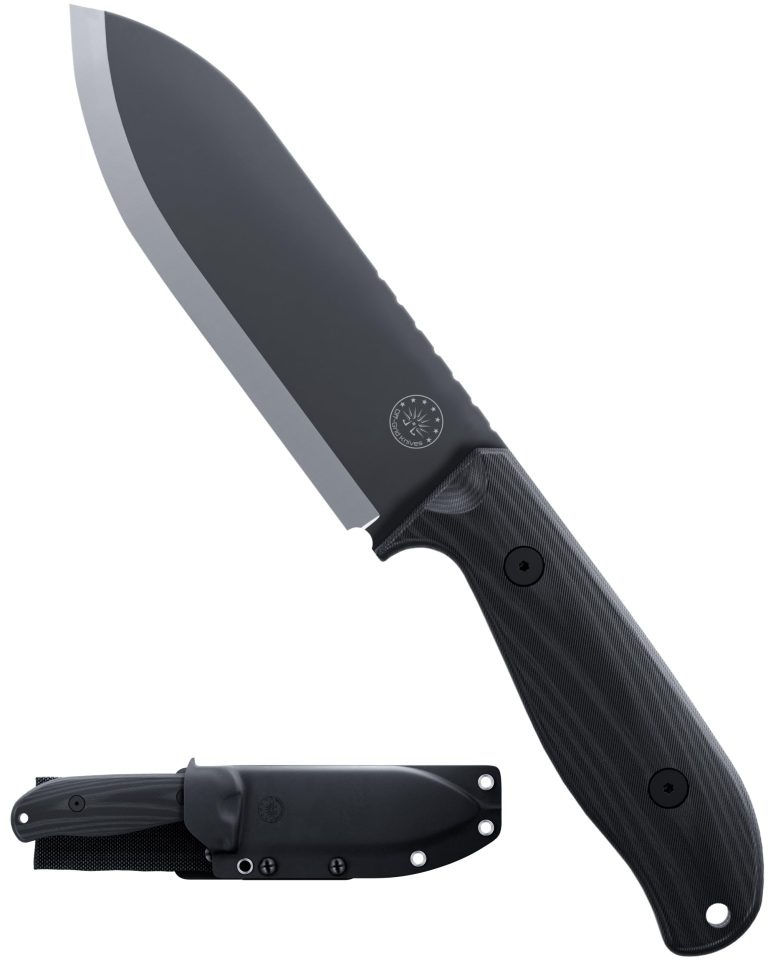
- Blade Material: Look for a knife made from high-quality stainless steel. This material is resistant to corrosion and will stay sharp even in wet conditions.
- Blade Design: Opt for a knife with a serrated edge. This design makes it easier to cut through a variety of materials, such as rope and webbing.
- Size: Consider the length of the blade. A shorter blade, around 2-3 inches, is ideal for kayaking as it offers control and maneuverability in tight spaces.
- Handle Material: Look for a knife with a handle made from a durable and non-slip material, such as rubber or textured plastic. This will provide a secure grip, even when wet.
- Attachment Options: Check if the knife comes with a sheath or mounting options. Having a sheath will allow you to easily and safely carry the knife on your person or attached to your kayak.
These are just a few factors to consider when selecting a suitable kayaking knife. Ultimately, it’s important to choose a knife that feels comfortable in your hand and meets your specific needs on the water. With the right knife by your side, you’ll be well-equipped for any kayaking adventure.
Measuring And Cutting The Sheath Material
This step-by-step guide provides clear instructions on how to measure and cut the sheath material for a DIY kayaking knife sheath. With concise and easy-to-follow steps, you’ll be able to create a functional and custom-fit sheath for your kayaking adventures.
Measuring Guidelines For The Knife Sheath:
One of the crucial steps in making a DIY kayaking knife sheath is measuring the sheath material accurately. This ensures that the sheath fits the knife perfectly and provides secure storage while you’re out on the water. Here are the guidelines to follow:
- Use a measuring tape to determine the length of your knife from the tip of the blade to the handle.
- Measure the width of your knife’s blade, including any protruding or serrated edges.
- Add about half an inch to the length measurement to allow room for the knife to slide in and out of the sheath easily.
- Consider the overall thickness and shape of your knife when choosing the width of the sheath material.
- Measure the thickness of your knife handle to determine the depth of the sheath.
- Keep in mind any additional features you want to incorporate, such as a securing strap or belt loop.
These measuring guidelines will help ensure that your DIY kayaking knife sheath fits perfectly and functions effectively in your outdoor adventures.
Cutting The Material To The Appropriate Size And Shape:
Now that you have the accurate measurements for your knife sheath, it’s time to cut the sheath material to the appropriate size and shape. Follow these steps:
- Mark the measurements on the sheath material using a pencil or marker.
- Use a ruler or straight edge to connect the markings and create straight lines.
- Double-check the measurements before cutting to ensure accuracy.
- Use sharp scissors or a utility knife to cut along the marked lines.
- Take your time and cut slowly to maintain precision and avoid accidental mistakes.
- Smooth out any rough edges or uneven surfaces with sandpaper or a file.
Cutting the sheath material to the correct size and shape is essential for a well-fitted and secure DIY kayaking knife sheath. Take your time, be precise, and ensure the edges are smooth to enhance the functionality and longevity of your sheath.
Credit: www.rmleathersupply.com
Creating The Base Of The Sheath
Learn how to create a sturdy base for your DIY kayaking knife sheath with this step-by-step guide. This resource provides a detailed walkthrough to help you get started on your project.
Whether you’re an experienced kayaker or just starting out, having a reliable and accessible knife sheath is essential for any outdoor adventure. Instead of purchasing one, why not try making your own? In this step-by-step guide, we’ll walk you through the process of creating a DIY kayaking knife sheath from scratch.
Get ready to get crafty and dive into this exciting project! Let’s begin by preparing the base material for the sheath.
Preparing The Base Material For The Sheath:
- Measure and cut a piece of durable fabric that will serve as the base of your sheath.
- Ensure that the fabric is wide enough to accommodate the length and width of your knife.
- Choose a fabric that is water-resistant and strong enough to withstand outdoor elements.
- Consider using heavy-duty nylon or canvas for optimal durability.
- Double-check the measurements and make any necessary adjustments before proceeding to the next step.
Now that the base material is ready, it’s time to shape and sew it to form the sheath. Follow along as we guide you through the process.
Shaping And Sewing The Base To Form The Sheath:
- Place the fabric flat on a clean and stable surface.
- Position your knife diagonally along one side of the fabric, leaving enough space for seam allowances.
- Fold the fabric over the knife and align the edges, ensuring a snug fit.
- Use fabric clips or pins to secure the folded fabric in place temporarily.
- Take a sewing machine or a needle and thread to stitch along the open sides, creating a pocket for the knife.
- Make sure to reinforce the stitching at the top and bottom edges for added durability.
- Remove the fabric clips or pins and carefully slide out the knife from the sheath pocket.
- Trim any excess fabric and neaten the edges to achieve a clean and professional finish.
- Give the sheath a quick test by inserting the knife back in to ensure a snug fit.
Congratulations! You have successfully created the base of your DIY kayaking knife sheath. In the next steps, we’ll explore how to add additional features such as belt loops, securing straps, and finishing touches to make it even more functional. Stay tuned for our next installment of this exciting guide!
Adding A Closure System
Learn how to add a closure system to your DIY kayaking knife sheath with this step-by-step guide. Keep your knife secure and easily accessible while out on the water.
When it comes to creating a DIY kayaking knife sheath, one crucial aspect is the closure system. This ensures that your knife is securely held in place, providing easy access when needed. In this guide, we will explore different options for closure systems and the steps to attach a secure closure to your sheath.
Options For Different Closure Systems:
- Buckle and strap: This popular closure option involves using a buckle and strap to secure the knife sheath. The strap is threaded through the buckle and tightened, creating a secure closure. This system allows for adjustable tension and easy release when required.
- Snap button: A snap button closure system is another common choice for kayaking knife sheaths. It consists of male and female components that easily snap together and firmly hold the sheath in place. This closure option offers quick and effortless access to your knife.
- Velcro: Velcro closures are a convenient and adjustable option for securing your knife sheath. The hook and loop fastening system allows for easy opening and closing, while also providing an adjustable fit. However, keep in mind that Velcro closures can be prone to wear and tear over time.
Steps To Attach A Secure Closure To The Sheath:
- Choose your closure type based on personal preference, ease of use, and durability.
- Measure and mark the appropriate locations for your closure system on the sheath. Ensure that it will securely hold the knife in place.
- Prepare your closure components according to the manufacturer’s instructions. This may involve cutting or attaching any necessary hardware.
- Attach one component of your closure system to the sheath using suitable tools, such as screws or adhesive. Make sure it is securely fastened.
- Attach the complementary component of your closure system to the opposite side of the sheath, aligning it with the previously attached component.
- Test the closure by inserting your knife into the sheath and securing it using the chosen closure system. Ensure that it holds the knife securely in place without excessive movement.
- Make any necessary adjustments to the closure system’s tension or position to achieve the desired level of security.
- Double-check all the attachments and closures to ensure they are properly secured. This will prevent any accidents or unintended knife releases during your kayaking adventures.
By adding a suitable closure system to your DIY kayaking knife sheath, you can have peace of mind knowing that your knife is securely kept within reach while you navigate the waters. Enjoy your kayaking experience with the confidence that comes from a well-secured and accessible knife sheath.
Incorporating Additional Pockets Or Attachments
This step-by-step guide teaches you how to incorporate additional pockets or attachments into your DIY kayaking knife sheath. Expand the functionality of your sheath and keep essential tools within reach while on the water.
Diy Kayaking Knife Sheath: A Step-By-Step Guide
Are you an adventurous kayaker looking for a practical way to keep your knife within reach while on the water? Building your own DIY kayaking knife sheath is a cost-effective and rewarding solution. In this step-by-step guide, we’ll explore the process of creating a custom sheath for your kayak knife.
In this section, we’ll delve into the benefits of incorporating additional pockets or attachments into your sheath design, as well as techniques for attaching these features.
Benefits Of Adding Pockets Or Attachments To The Sheath:
Adding extra pockets or attachments to your DIY kayaking knife sheath can greatly enhance its functionality and convenience. Here are some key advantages to consider:
- Increased storage: Additional pockets provide space for storing small essentials like whistles, lighters, or fishing hooks, eliminating the need for carrying separate containers.
- Organizational efficiency: Multiple pockets allow you to categorize and separate items within your sheath, making it easier to locate and access specific tools or gear during emergency situations.
- Versatility: By incorporating attachments like a D-ring or carabiner, you can secure larger items such as compasses, flashlights, or guided maps to your sheath, enabling quick accessibility when needed.
- Customization: Additional pockets and attachments provide the opportunity to tailor your sheath to meet your individual needs and preferences, ensuring that everything you require is effectively stowed while you navigate the water.
- Safety and preparedness: Having everything you need within your reach reduces the risk of accidents that may arise from reaching into multiple bags or compartments during critical moments.
Techniques For Attaching Additional Features:
When incorporating extra pockets or attachments into your DIY kayaking knife sheath, it’s crucial to choose reliable methods for secure fastening. Here are some effective techniques to consider:
- Sew-on pockets: Attach additional pockets to the sheath by sewing them directly onto the fabric. Ensure the stitching is strong and use a durable thread that can withstand exposure to water and outdoor elements.
- Hook-and-loop fasteners: Utilize hook-and-loop fasteners, such as Velcro, to add detachable pockets or attachments. This allows for easy removal and reattachment, providing flexibility for different kayaking trips or changing needs.
- Adhesive bonding: Use heavy-duty fabric glue or adhesive tape specifically designed for outdoor use to attach pockets or attachments to the sheath. Ensure that the adhesive is waterproof and capable of withstanding the rigors of kayaking.
- Molle system: Consider integrating a Molle (Modular Lightweight Load-carrying Equipment) system into your sheath design. This system uses webbing and compatible attachments, offering a versatile and secure way to attach additional pockets, tools, or equipment.
- Grommets or eyelets: Install grommets or eyelets along the edges of the sheath to accommodate attachment points for carabiners or hooks. This method provides a durable and easy-to-use solution for securing larger items.
By incorporating additional pockets or attachments into your DIY kayaking knife sheath, you can optimize its functionality and ensure that all your essential gear is organized and easily accessible while out on the water. Choose suitable attachment techniques based on your specific requirements and enjoy the convenience of a customized sheath that meets your kayaking needs.
Reinforcing The Sheath
Get ready to reinforce your DIY kayaking knife sheath with this step-by-step guide. Learn how to strengthen and protect your sheath in a simple and efficient way, ensuring your knife stays secure during all your kayaking adventures.
When it comes to DIY kayaking knife sheaths, reinforcing the sheath is key to ensure durability and longevity. By strengthening specific areas prone to wear and tear, you can ensure that your sheath remains intact, even in rugged conditions. Take a look at these tips for reinforcing your kayaking knife sheath:
- Use heavy-duty materials: Opt for strong and durable materials such as thick leather or sturdy nylon fabric for the sheath. This will provide added protection and make it more resistant to abrasions and punctures.
- Reinforce the edges: The edges of the sheath are often the first to show signs of wear. To prevent this, consider adding an extra layer of fabric or leather to reinforce the edges, helping to prevent fraying or tearing.
- Double stitching: Stitching plays a vital role in the strength of the sheath. Consider using double stitching or using a stronger thread to reinforce the seams and prevent them from unraveling.
- Rivets or eyelets: Adding rivets or eyelets to specific areas of the sheath can help distribute stress and reinforce vulnerable spots. This can be particularly useful around the belt loop or places where the knife is inserted into the sheath.
- Additional layers: If you want to take reinforcement a step further, you can add additional layers inside the sheath. This can be done by creating a pocket-like structure with multiple layers of fabric or by inserting a stiffening material such as plastic or Kydex.
- Heat-sealing: If your sheath is made of synthetic materials like nylon, heat-sealing the edges can prevent fraying and provide added reinforcement.
- Reinforce the belt loop: The belt loop is a crucial component of the sheath that often takes a lot of strain. Consider using thick and sturdy materials for the belt loop and reinforce it with extra stitching or rivets.
- Water and weatherproofing: To ensure longevity, don’t forget to protect your sheath from the elements. Consider applying a waterproofing treatment to the material to prevent moisture damage and prolong its lifespan.
- Regular maintenance: Even with reinforced sheath, it’s important to regularly inspect and maintain it. Keep an eye out for any signs of wear or damage and make necessary repairs to prevent further issues.
- Test and adjust: Once you’ve reinforced your sheath, it’s essential to test it out in real-life kayaking conditions. Pay attention to any weak points or signs of wear, and make adjustments as needed to ensure its durability and longevity.
By following these tips for reinforcing specific areas of wear and tear, you can enhance the durability of your DIY kayaking knife sheath and enjoy your kayaking adventures with peace of mind.
Testing And Adjustments
Discover how to create your own DIY kayaking knife sheath with this step-by-step guide. Learn the testing and adjustment techniques necessary to ensure a perfect fit and optimal functionality for your next kayaking adventure.
Kayaking is a thrilling outdoor activity that allows you to explore beautiful waterways while enjoying the serenity of nature. To ensure a safe and enjoyable experience, it’s essential to have the right equipment, including a reliable kayaking knife and a functional sheath to keep it secure.
In this step-by-step guide, we will walk you through the process of making your own DIY kayaking knife sheath. In this section, we will focus on testing the functionality and fit of the sheath, as well as making any necessary adjustments for a perfect fit.
How To Test The Functionality And Fit Of The Sheath:
- Begin by inserting your kayaking knife into the sheath to check if it fits securely. Gently slide the knife in and out to ensure smooth and easy access.
- Test the sheath’s retention by turning it upside down and giving it a gentle shake. Your knife should remain securely in place without falling out.
- Take your kayak out for a spin in calm waters, making sure to secure the sheath to your kayak or life jacket using the designated attachment points. This will allow you to test the sheath’s functionality while in motion.
- Perform various kayaking maneuvers, including paddling and rolling, to test how well the sheath holds up. Ensure that the knife stays securely in the sheath and doesn’t become loose or dislodged.
- Pay attention to any discomfort or inconvenience caused by the sheath’s positioning and adjust it accordingly. The sheath should be easily accessible and positioned in a way that doesn’t hinder your movements.
Making Any Necessary Adjustments For A Perfect Fit:
- If you find that the sheath doesn’t fit snugly or the retention is not satisfactory, consider adding padding or inserts to create a tighter fit.
- Use Velcro straps or adjustable fasteners to secure the sheath more firmly if it feels loose or wobbly.
- Experiment with different attachment points to find the most comfortable and accessible position for the sheath.
- Take into account personal preferences and kayaking style when adjusting the sheath to ensure it meets your specific needs.
- Continuously test and adjust the sheath as needed to achieve the perfect fit and functionality for your kayaking adventures.
By following these testing and adjustment steps, you can ensure that your DIY kayaking knife sheath is not only secure but also optimized for your comfort and convenience on the water. With a reliable sheath in place, you can confidently navigate through your kayaking expeditions while having your knife readily accessible whenever you need it.
So, get ready to enjoy a thrilling and safe kayaking experience with your newly crafted DIY kayaking knife sheath!
Applying A Finish
Learn how to apply a finish to your DIY kayaking knife sheath with this step-by-step guide. Protect and enhance the appearance of your sheath with a smooth and professional-looking finish.
A well-applied finish not only protects your DIY kayaking knife sheath, but it also enhances its overall appearance. Here, we’ll explore the different types of finishes suitable for the sheath material and provide step-by-step instructions for applying a protective finish.
Types Of Finishes Suitable For The Sheath Material
When choosing a finish for your DIY kayaking knife sheath, it’s important to consider the material you’re working with. Here are some types of finishes that work well with common sheath materials:
- Leather sheaths: Leather finishes, such as leather balm or leather conditioner, help moisturize and protect the leather while giving it a polished look.
- Nylon sheaths: For nylon sheaths, a waterproof spray or fabric sealant can provide an excellent protective layer, ensuring durability and water resistance.
- Cordura or canvas sheaths: These types of sheaths can benefit from a coating of fabric protectant spray, ensuring resistance to stains and extending their lifespan.
Instructions For Applying A Protective Finish To The Sheath
Follow these step-by-step instructions to apply a protective finish to your DIY kayaking knife sheath:
- Prepare the sheath: Ensure that the sheath is clean and free of any dust or debris. Use a soft cloth to wipe away any dirt or grime.
- Choose the appropriate finish: Consider the material of your sheath and select a suitable finish (as mentioned above). Read the manufacturer’s instructions and gather the necessary tools and materials.
- Apply the finish: Start by testing the finish on a small, inconspicuous area of the sheath to ensure compatibility and desired results. Once confirmed, follow these steps:
- For leather sheaths: Apply a small amount of leather balm or leather conditioner onto a soft cloth or sponge. Gently rub the finish onto the sheath in circular motions, ensuring even coverage.
- For nylon or fabric sheaths: Hold the spray can of waterproofing or fabric protectant approximately 6-8 inches away from the sheath. Spray an even coat, making sure to cover the entire surface. Allow it to dry completely.
- Multiple coats (if needed): Depending on the material and desired level of protection, you may need to apply multiple coats of the finish. Follow the manufacturer’s instructions for recommended drying times between coats.
- Final touches: Once the sheath is dry, inspect it for any missed areas or uneven coverage. Apply additional coats or touch-ups as necessary.
Remember, applying a finish to your DIY kayaking knife sheath not only protects it from the elements but also adds a professional touch. Follow these simple steps, and your sheath will be ready to accompany you on your adventures in no time.
Maintenance And Care
Learn how to create a DIY kayaking knife sheath with our step-by-step guide. This comprehensive tutorial will help you maintain and care for your kayaking gear easily.
Tips For Maintaining And Caring For Your Diy Kayaking Knife Sheath:
Regular maintenance routines to prolong its lifespan, ensuring your DIY kayaking knife sheath remains in optimal condition. This section provides essential tips and care instructions to help you keep your sheath in top shape throughout your kayaking adventures.
Keeping your DIY kayaking knife sheath well-maintained ensures it remains durable, functional, and safe to use. Follow these simple guidelines for a longer-lasting sheath:
- Clean and rinse your sheath after each kayaking trip:
- This removes any dirt, sand, or saltwater residue that can damage the sheath over time.
- Using fresh water and a soft cloth, gently wipe the sheath to ensure it is thoroughly clean.
- Pay special attention to any hard-to-reach areas, such as crevices or buckles, that may accumulate debris.
- Allow the sheath to air dry completely:
- After cleaning, ensure the sheath is completely dry before storing it.
- Moisture trapped within the sheath can lead to mold or corrosion, which can be detrimental to its longevity.
- Apply a protective coating or lubricant:
- Using a silicone-based spray or lubricant, lightly coat the sheath’s surface to protect it against moisture and corrosion.
- Avoid using petroleum-based products as they may damage the material.
- Wipe off any excess lubricant to prevent it from transferring onto other gear.
- Store in a cool, dry place:
- Proper storage is crucial to maintaining the sheath’s structural integrity.
- Store the sheath away from direct sunlight, extreme temperatures, and humidity, as these conditions can accelerate wear and tear.
- Check for any signs of wear or damage:
- Regularly inspect your DIY kayaking knife sheath for any signs of fraying, loose stitches, or cracks.
- If you notice any damage, promptly repair or replace the sheath to prevent any accidents or further deterioration.
- Avoid excessive pressure or pulling:
- When inserting or removing the knife from the sheath, apply gentle pressure to avoid straining the sheath’s material.
- Be careful not to force the knife, as this can lead to damage or even injury.
By incorporating these simple maintenance routines into your kayaking gear care ritual, you can enjoy a longer lifespan for your DIY kayaking knife sheath. Keeping it clean, dry, and in good condition ensures you have a reliable and safe tool whenever you venture out on the water.
Enhancing Safety While Using The Sheath
Enhance your safety while using a kayak knife sheath with this step-by-step guide. Learn how to create a DIY sheath for your knife to ensure secure and convenient access during your kayaking adventures.
Safety Guidelines When Using The Sheath On The Water:
Kayaking is an exhilarating outdoor activity that allows you to explore the beauty of the water while getting a workout. It’s important, however, to prioritize safety while enjoying your time on the water. When using a DIY kayaking knife sheath, you need to adhere to certain safety guidelines to ensure accidents and injuries are prevented.
Here are the best practices to enhance safety:
- Always secure the sheath properly: Securely fasten the sheath to your kayak or personal floatation device (PFD), ensuring it is easily accessible yet securely in place.
- Orient the sheath correctly: Keep the sheath positioned in a way that allows you to draw the knife easily with your dominant hand, without obstructing your movements or getting caught on other equipment.
- Practice drawing and sheathing the knife: Familiarize yourself with the technique of drawing and sheathing the knife while in a safe environment. Practice the motions to enhance muscle memory and ensure smooth and efficient usage.
- Maintain situational awareness: While paddling, always stay aware of your surroundings, including the presence of other people, wildlife, submerged objects, and changing water conditions. This awareness will help you make appropriate decisions while using the knife sheath.
- Stay clear of others: Keep a safe distance from other kayakers or water enthusiasts to prevent accidental injuries. Avoid using the knife in crowded areas when unnecessary.
- Protect the blade: Make sure the knife’s blade is securely covered by the sheath at all times unless it is actively being used. This prevents accidental cuts or stabs while maneuvering or storing the knife.
- Use the knife as a last resort: The knife should only be used when all other options for release, rescue, or self-defense have been exhausted. Prioritize non-violent resolutions to any situation, and utilize the knife responsibly and ethically, if required.
As with any water sport, it is crucial to maintain safety while using a DIY kayaking knife sheath. By adhering to these guidelines, you can enhance your safety and that of others around you, ensuring a memorable and accident-free paddling experience.
Frequently Asked Questions On Diy Kayaking Knife Sheath: A Step-By-Step Guide
How Do I Make A Diy Kayaking Knife Sheath?
To make a DIY kayaking knife sheath, you will need some materials like nylon fabric, scissors, needle, thread, and a ruler. Measure and cut the fabric according to the size of your knife, leaving allowance for the seam. Sew the fabric together, leaving one end open, and then slide your knife into the sheath.
Finally, sew the open end closed to secure your knife.
Why Do I Need A Knife Sheath For Kayaking?
A knife sheath is essential for kayaking as it helps ensure the safety of both you and your equipment. In case of emergencies, like entanglement in fishing lines or rope, having a readily accessible knife can save lives. Additionally, a sheath keeps your knife securely in place, preventing accidents or loss while on the water.
What Are The Benefits Of A Diy Kayaking Knife Sheath?
Making your own kayaking knife sheath offers a range of benefits. First, it allows you to customize the design and size to fit your knife perfectly. Second, it can save you money compared to buying a pre-made sheath. Lastly, the process of creating your own sheath can be a fulfilling and enjoyable DIY project.
Can I Use Any Type Of Fabric For A Diy Knife Sheath?
While you have some flexibility in choosing fabric for your DIY knife sheath, it’s recommended to use a durable and water-resistant material like nylon. Nylon fabric is lightweight, sturdy, and resistant to wear and tear. It also dries quickly, making it ideal for use in water sports like kayaking.
Conclusion
After following this step-by-step guide, you can now confidently create your very own DIY kayaking knife sheath. By using readily available materials and simple tools, you have learned how to customize a knife sheath that meets your specific needs. Taking the time to craft your own sheath not only saves you money but also allows you to add a personal touch to your kayaking gear.
Remember to consider safety precautions and choose materials that are durable and waterproof. Whether you are an experienced kayaker or just starting out, having a reliable and accessible knife sheath is essential for any adventure on the water. With a little patience and creativity, you can embark on your kayaking trips with peace of mind knowing that you have a secure and functional sheath for your knife.
Happy kayaking!